Introduction
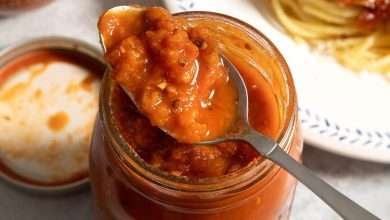
Canning caramel apple jam is one of those cozy and heartwarming kitchen experiences that fill your home with the smell of fresh apples and sweet caramel. It is the kind of recipe that makes you feel connected to old-fashioned traditions while still creating something beautiful and delicious for today. This jam captures the taste of warm caramel mixed with soft apples, making every spoonful taste like autumn in a jar. Whether you spread it on your morning toast, swirl it into your oatmeal, or drizzle it on pancakes, every bite feels like comfort and love.
People love caramel apple jam because it brings back happy memories of caramel apples from fairs, apple-picking days, and cozy fall evenings. It combines the sweetness of caramel with the gentle tartness of apples, giving a flavor that is both familiar and new. The best part is that this jam can be canned and stored for months, so you can enjoy the warm taste of fall any time of the year. Many people also love giving homemade jars of caramel apple jam as thoughtful gifts during the holidays. It is simple, special, and always made with care.
You can make this jam when apples are in season, especially in late summer or autumn, but you can enjoy making it any time you crave something warm and sweet. It is a wonderful way to use up apples that are slightly bruised or too soft for fresh eating. This recipe also fits perfectly for people who enjoy creating homemade treats with wholesome ingredients. Making your own jam means you can control the sugar level, skip preservatives, and make something that feels truly yours. When you make caramel apple jam, you are not just making food. You are creating a memory, a tradition, and a jar of happiness that can be shared with those you love.
Ingredients You Will Need
Here is everything you need to make about six to seven jars of this delicious caramel apple jam.
-
Apples – 8 cups, peeled, cored, and finely chopped (about 6 to 8 medium apples)
-
Granulated sugar – 4 cups
-
Brown sugar – 1 cup, packed
-
Lemon juice – 3 tablespoons, freshly squeezed
-
Butter – 1 tablespoon (helps reduce foam)
-
Water – 1 cup
-
Pectin powder – 1 packet (about 1.75 ounces)
-
Vanilla extract – 1 teaspoon
-
Ground cinnamon – 1 teaspoon (optional for extra flavor)
-
Salt – a pinch
Step by Step Method
Step 1: Prepare the apples
Start by washing your apples thoroughly under cool water. Peel them and remove the cores. Chop the apples into small even pieces so they cook evenly. The smaller you chop them, the smoother your jam will be. If you prefer a chunkier texture, you can cut them into slightly larger cubes. Place the chopped apples in a large bowl and sprinkle the lemon juice over them. Mix gently to keep them from turning brown.
Step 2: Make the caramel base
In a large heavy-bottomed pot, add the brown sugar and a small amount of water, about half a cup. Turn on the heat to medium and stir gently. Allow the sugar to melt slowly. Keep stirring so it does not burn. After a few minutes, the sugar will start turning golden and then a deep amber color. This is your caramel base. Be patient at this stage, as caramel can quickly turn from perfect to burnt if the heat is too high. When the caramel has a rich golden color and smells sweet, it is ready.
Step 3: Add apples and water
Now carefully add the chopped apples and the remaining half cup of water into the caramel. Be careful because the mixture will bubble and steam. Stir everything together until the apples are well coated in caramel. Add the granulated sugar and a pinch of salt. The salt helps to balance the sweetness and deepen the flavor.
Step 4: Cook until soft
Let the apples cook on medium heat for about twenty to twenty five minutes. Stir often so nothing sticks to the bottom. The apples will start to soften and release their juices. The mixture should look thick and glossy. If it becomes too dry, you can add a few spoonfuls of water. Keep cooking until the apples are tender enough to mash with the back of your spoon.
Step 5: Add pectin and boil
Once the apples are soft and the mixture looks rich, sprinkle in the pectin powder. Stir constantly to make sure it dissolves completely. Increase the heat slightly and bring the jam to a full rolling boil that cannot be stirred down. Let it boil for one full minute while stirring the whole time. This step is important for the jam to set properly once cooled.
Step 6: Add final flavor touches
After boiling, turn off the heat and stir in the vanilla extract, cinnamon, and butter. The butter helps reduce foam and adds smoothness to the jam. Mix everything until it looks glossy and smooth. You can also taste it at this point and adjust by adding a bit more cinnamon or vanilla if you like stronger flavors.
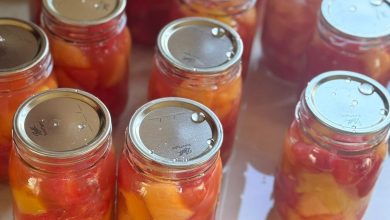
Step 7: Prepare jars and lids
Before filling your jars, make sure they are clean and hot. You can place the jars in a pot of boiling water for about ten minutes or run them through the dishwasher on a hot cycle. Keep the jars warm until ready to use. This helps prevent them from cracking when filled with hot jam.
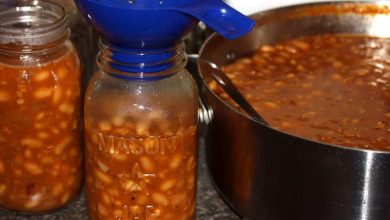
Step 8: Fill the jars
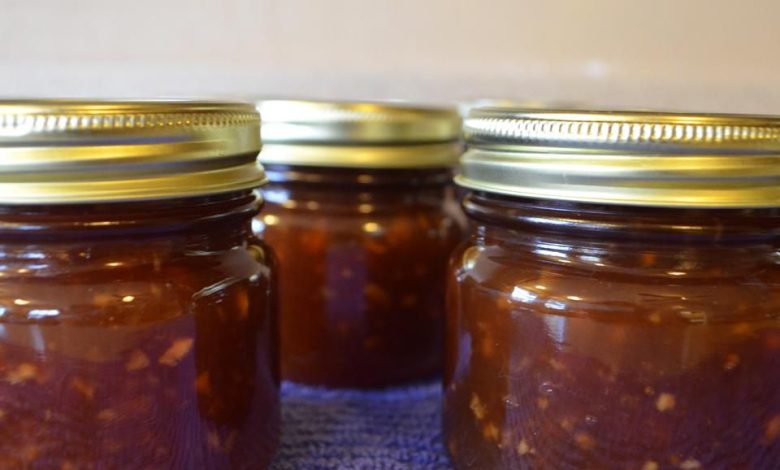
Using a clean ladle or wide-mouth funnel, pour the hot caramel apple jam into the warm jars. Leave about one quarter inch of space at the top. Wipe the rims of the jars with a clean damp cloth to remove any spills. Place the lids on top and screw on the bands until fingertip tight.
Step 9: Process the jars
Place the filled jars in a large canning pot with a rack on the bottom. Add enough hot water to cover the jars completely. Bring the water to a boil and process the jars for about ten minutes if you are at sea level, or up to fifteen minutes if you live at a higher altitude. This step ensures that your jam is safely sealed and can be stored for a long time.
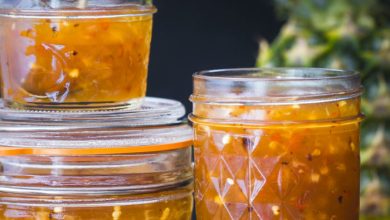
Step 10: Cool and store
Once the processing time is done, turn off the heat and let the jars sit in the hot water for five minutes. Then carefully remove them using jar tongs and place them on a towel to cool. Do not touch the lids while they seal. You will hear popping sounds as the jars cool, which means they are sealing properly. Once cool, check the lids to make sure they are sealed tight. Store the jars in a cool, dark place for up to one year. Opened jars should be kept in the refrigerator and used within a few weeks.
Why This Recipe Is Special
Canning caramel apple jam is not just another jam recipe. It is a flavor that blends the deep sweetness of caramel with the fresh fruitiness of apples, creating something truly unique. The taste reminds people of warm caramel apples from fairs or cozy nights by the fire. The soft apple pieces melt into the golden caramel, giving each spoonful a rich, buttery sweetness that feels like a treat.
From a health point of view, apples bring natural vitamins, fiber, and antioxidants. They are known for supporting digestion and heart health. By making this jam at home, you can control the amount of sugar and choose fresh ingredients. Unlike store-bought versions, this homemade recipe has no preservatives or artificial flavorings. It is pure comfort food that is both nourishing and delightful.
This recipe is also special because it can be enjoyed in many ways. You can spread it on bread, swirl it into yogurt, or serve it with ice cream. It makes a great topping for waffles and pancakes, or even as a filling for cakes and pastries. Each jar captures the spirit of homemade love and can make a perfect gift for family and friends during the holidays.
Extra Tips for Better Taste
-
Choose the right apples. A mix of tart and sweet apples gives the best flavor. Try using Granny Smith for tartness and Fuji or Honeycrisp for sweetness.
-
Add a hint of spice. A pinch of nutmeg or clove can make the jam even more aromatic.
-
Do not rush the caramel. Take your time melting the sugar until it turns a rich amber color. This brings out a deep, buttery flavor that makes the jam stand out.
-
Use real vanilla. Pure vanilla extract adds warmth and richness to the flavor. Avoid artificial versions for the best result.
-
Test the set. To check if your jam is ready, place a small amount on a cold plate and let it sit for a minute. If it wrinkles when pushed, it is done.
-
Keep it smooth. If you prefer a smoother jam, blend the mixture slightly before adding the pectin.
-
Add a touch of sea salt. A small pinch of salt can highlight the caramel flavor beautifully.
-
Gift it beautifully. Decorate the jars with ribbons and labels for festive gifts. A jar of caramel apple jam always brings smiles.
Final Thoughts
Canning caramel apple jam is a wonderful way to bring warmth and sweetness into your kitchen. It combines the best of both worlds, the freshness of apples and the deep golden flavor of caramel. Making this jam is more than just cooking; it is a joyful process that connects you with tradition, creativity, and comfort. Whether you make it for yourself, for your family, or to give as gifts, it will always carry a touch of homemade love.
Each spoonful tells a story of patience, care, and the beauty of simple ingredients turned into something extraordinary. So gather your apples, prepare your jars, and start this delightful kitchen adventure. You will find that canning caramel apple jam is not only rewarding but also a truly heartwarming experience.
Nutrition Details
| Nutrient | Per Recipe (Approx.) | Per Serving (1 tablespoon) |
|---|---|---|
| Calories | 1600 kcal | 40 kcal |
| Carbohydrates | 400 g | 10 g |
| Sugars | 370 g | 9 g |
| Fat | 8 g | 0.2 g |
| Protein | 2 g | 0.05 g |
| Fiber | 10 g | 0.2 g |
| Sodium | 120 mg | 3 mg |
| Vitamin C | 25% DV | 2% DV |
| Calcium | 3% DV | 1% DV |
| Iron | 2% DV | 0.5% DV |
Values are approximate and may vary depending on ingredients used.
Disclaimer
This recipe is meant for general information and enjoyment. Every person’s body is different, and individual results or reactions may vary. If you have allergies or special dietary needs, please check the ingredients carefully or consult your healthcare provider before consuming. Always store homemade canned goods safely and discard any jars that show signs of spoilage.