Sourdough Sandwich Bread – Soft, Tangy & Perfect for Daily Toast
Introduction
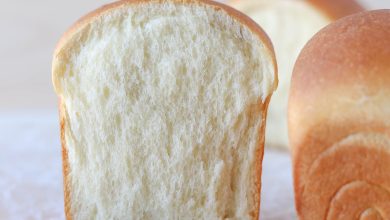
Sourdough sandwich bread is one of the most comforting and heartwarming recipes you can make in your kitchen. It has a soft and tender texture inside, a slightly chewy crust, and that lovely hint of tangy flavor that only sourdough can bring. This bread feels homely and rich with every bite. When you slice through a freshly baked loaf, the smell alone can make your mouth water and fill your house with warmth. It is the kind of bread that reminds people of home, patience, and the simple joy of making something with love.
People love sourdough sandwich bread because it is both wholesome and satisfying. It is perfect for all kinds of sandwiches, from simple butter toast to rich grilled cheese. You can enjoy it for breakfast with jam or use it to build a hearty lunch sandwich. What makes sourdough special is the natural fermentation process, which gives the bread a deep flavor that regular yeast bread cannot match. Many people find that sourdough is also easier to digest, thanks to the long fermentation time that helps break down gluten and sugars.
This bread is worth making when you want something nourishing, delicious, and homemade. It is perfect for anyone who enjoys mindful cooking or wants to bring more natural food into their life. Making sourdough sandwich bread can also be a calming weekend activity. The process teaches patience and rewards you with a beautiful loaf that you can share with your family or enjoy all week long. Every step, from feeding the starter to pulling the baked loaf from the oven, brings a sense of peace and accomplishment.
Ingredients You Will Need
Here is everything you need to make soft and flavorful sourdough sandwich bread. Make sure your sourdough starter is active and bubbly before you begin.
-
1 cup (240 grams) active sourdough starter
-
1 and 1 half cups (360 milliliters) warm water
-
4 cups (480 grams) all-purpose flour or bread flour
-
2 tablespoons (25 grams) sugar
-
2 tablespoons (30 grams) unsalted butter, softened
-
1 and 1 half teaspoons (9 grams) salt
-
1 tablespoon (15 milliliters) olive oil for greasing the pan
Optional but recommended:
-
2 tablespoons (20 grams) milk powder for extra softness
-
1 tablespoon (15 grams) honey for mild sweetness
Step by Step Method
Step 1: Activate the sourdough starter
Before you begin, make sure your sourdough starter is strong and bubbly. Feed it several hours before baking. When it doubles in size and looks full of air bubbles, it is ready to use. A healthy starter is the heart of good sourdough bread because it helps the dough rise naturally and gives that perfect tangy flavor.
Step 2: Mix the wet ingredients
In a large mixing bowl, combine the active sourdough starter and warm water. Stir gently until the starter dissolves completely. Add the sugar and butter, then mix again until everything blends nicely. The warm water helps the starter mix easily and activates the fermentation process faster.
Step 3: Add the dry ingredients
Add the flour and salt to the mixture. If you are using milk powder or honey, add them at this stage too. Use a spoon or your hands to mix until a rough dough forms. The dough will look a little sticky at first, and that is normal. Do not add too much extra flour at this stage because sourdough needs hydration to rise well.
Step 4: Knead the dough
Turn the dough onto a lightly floured surface and start kneading. You can knead by hand for about 10 to 12 minutes or use a stand mixer with a dough hook for around 8 minutes. The goal is to create a soft, elastic dough that is slightly tacky but not sticking heavily to your hands. As you knead, you are developing gluten, which gives the bread structure and helps it hold air during fermentation.
Step 5: First rest or bulk fermentation
Place the kneaded dough into a lightly oiled bowl. Cover it with a damp towel or plastic wrap. Let it rest at room temperature for 4 to 6 hours, depending on how warm your kitchen is. During this time, the dough will rise and become airy. Every hour or two, you can stretch and fold the dough gently to strengthen its structure. This helps build a light and fluffy crumb in the final bread.
Step 6: Shape the dough
Once the dough has doubled in size, it is time to shape it. Turn the dough out onto a clean surface and gently press it to remove large air bubbles. Shape it into a rectangle roughly the size of your loaf pan. Roll it up tightly from one end to the other to create a smooth loaf shape. Pinch the seam closed at the bottom.
Step 7: Second rise or proofing
Grease your loaf pan with olive oil and place the shaped dough inside. Cover it lightly with a towel and let it proof for 2 to 4 hours at room temperature, or until it rises nearly to the top of the pan. If your kitchen is cooler, you can let it proof overnight in the refrigerator. This slower rise adds even more flavor and improves the bread’s texture.
Step 8: Preheat the oven
Preheat your oven to 375 degrees Fahrenheit (190 degrees Celsius). Place an empty metal pan on the lower rack while preheating. When it is time to bake, you can add some hot water to that pan to create steam, which helps the bread rise beautifully and gives a soft crust.
Step 9: Bake the bread
Once the oven is ready, place your loaf pan on the middle rack. Bake for 35 to 40 minutes, or until the top is golden brown and the bread sounds hollow when tapped. If you have a thermometer, the inside of the bread should reach about 200 degrees Fahrenheit (93 degrees Celsius).
Step 10: Cool before slicing
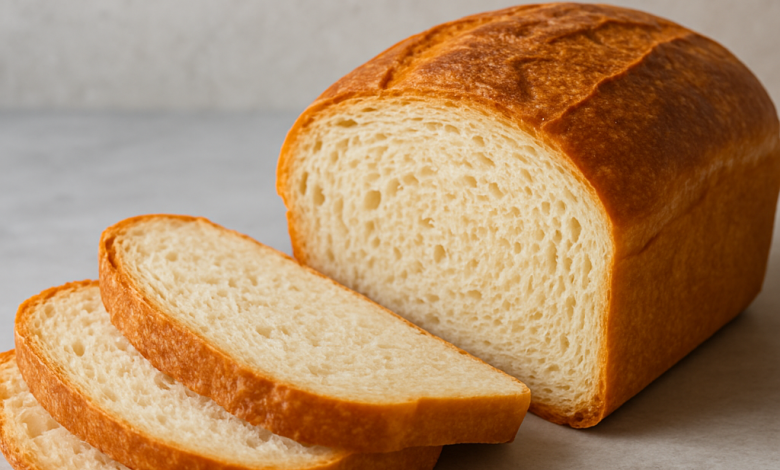
Remove the loaf from the pan and let it cool completely on a wire rack. This step is very important because cutting the bread while it is still hot can make the inside gummy. Once cooled, slice it into even pieces and enjoy the soft, slightly tangy, and perfectly balanced flavor of your homemade sourdough sandwich bread.
Why This Recipe Is Special
Sourdough sandwich bread is not just another loaf of bread. It is a wholesome, slow-made, and naturally fermented food that brings many benefits. The natural fermentation process makes sourdough easier to digest and can lower its glycemic index, which means it affects blood sugar less than regular bread. This makes it a better option for people who prefer balanced energy throughout the day.
The flavor is another reason why this recipe is special. It has a gentle tang that pairs well with both sweet and savory toppings. It is soft enough for sandwiches but still holds its shape without tearing easily. The combination of natural fermentation and long proofing time gives it a rich aroma and a deep, satisfying taste that store-bought bread can never match.
This bread also feels deeply rewarding to make. It is a recipe that connects you with traditional baking methods and reminds you that good food takes time. Each loaf tells a story of patience, care, and love. Sharing homemade sourdough sandwich bread with your family can create memories around the table that last a lifetime.
Extra Tips for Better Taste
-
Use high-quality flour. Good flour makes a big difference in flavor and texture. Try to use unbleached bread flour or organic all-purpose flour for the best results.
-
Add a touch of honey or milk. A small spoon of honey or a little milk can give your bread a softer crumb and slightly sweet flavor that complements the sourdough tang beautifully.
-
Control the temperature. The warmth of your kitchen affects how fast the dough rises. If it is too cold, wrap the bowl in a towel or place it in a slightly warm oven with the light on.
-
Try whole grain additions. You can mix a small portion of whole wheat flour, oats, or seeds for extra nutrition and a nutty flavor.
-
Do not rush the fermentation. Patience is the key to a good sourdough loaf. The longer the dough ferments, the better the flavor develops.
-
Brush with butter. After baking, brush the top of the hot loaf with melted butter to give it a soft crust and a shiny finish.
-
Store it properly. Keep the bread in a clean cloth or airtight container at room temperature for up to three days. You can also freeze slices for later use.
Final Thoughts
Making sourdough sandwich bread is a beautiful experience that combines tradition, patience, and flavor. Every loaf you bake becomes a little better as you learn how your starter behaves and how the dough feels in your hands. Once you master it, you will find that you no longer want to buy bread from the store. Homemade sourdough sandwich bread tastes fresher, lasts longer, and fills your home with the comforting smell of real baking.
Whether you are making it for yourself, for your family, or for a friend, this bread always brings joy. It is food made with love and time, and that makes every slice more meaningful. So, roll up your sleeves, get your starter ready, and bake a loaf that will make your kitchen feel like the heart of your home.
Nutrition Details
For the entire recipe (1 loaf, about 12 slices)
| Nutrient | Total per Loaf | Per Serving (1 slice) |
|---|---|---|
| Calories | 1650 kcal | 138 kcal |
| Carbohydrates | 320 g | 26.6 g |
| Protein | 48 g | 4 g |
| Fat | 28 g | 2.3 g |
| Fiber | 10 g | 0.8 g |
| Sugar | 10 g | 0.8 g |
| Sodium | 1600 mg | 133 mg |
| Iron | 8 mg | 0.6 mg |
| Calcium | 90 mg | 7.5 mg |
Note: Nutrition values can vary depending on your flour type, starter hydration, and additional ingredients such as honey or milk powder.
Disclaimer
This recipe is made for general cooking enjoyment and basic nutrition purposes. Everyone’s body is different, and how your body responds to sourdough or any bread can vary. If you have specific dietary conditions, gluten sensitivity, or any health concerns, it is always best to consult your healthcare provider or nutritionist before making changes to your diet.